How to Create Custom Stickers with Img2Go
A Step-by-Step Guide to Great Designs
30. July 2025 by Bianca Palmer
Stickers are a vibrant way to express creativity, promote a brand, or personalize everyday items such as laptops, water bottles, or notebooks. With AI art generators, designing custom stickers is now faster, easier, and more accessible than ever. No graphic design experience is required. In this blog, we'll guide you through using Img2Go's AI Creator Studio, to create eye-catching stickers.
Why Use AI Art Generators for Stickers?
AI art generators have transformed sticker creation by offering speed, flexibility, and creativity. Here's why they're ideal for sticker design:
- Speed: Generate professional-quality designs in seconds by typing a text prompt.
- Customization: Tailor designs to your vision with endless style and color options.
- Sticker-Optimized Features: Platforms like Img2Go offer a sticker art style.
- High-Resolution Output: AI tools produce images suitable for both digital and physical stickers.
- No Design Skills Needed: Anyone can create impressive stickers with minimal effort.
What Makes a Good Sticker Design?
To create a great sticker, several key principles come into play:
Clarity and Simplicity
A good sticker is instantly recognizable. Overly intricate designs can get lost on a small surface, so focus on clean, bold visuals. Simplify your design to include only the most essential elements.
Contrast and Color
High contrast helps stickers stand out. Bright, bold colors and defined outlines are vital for making designs pop. Choose color combinations that will grab attention and stay visible at small sizes.
Clear Borders
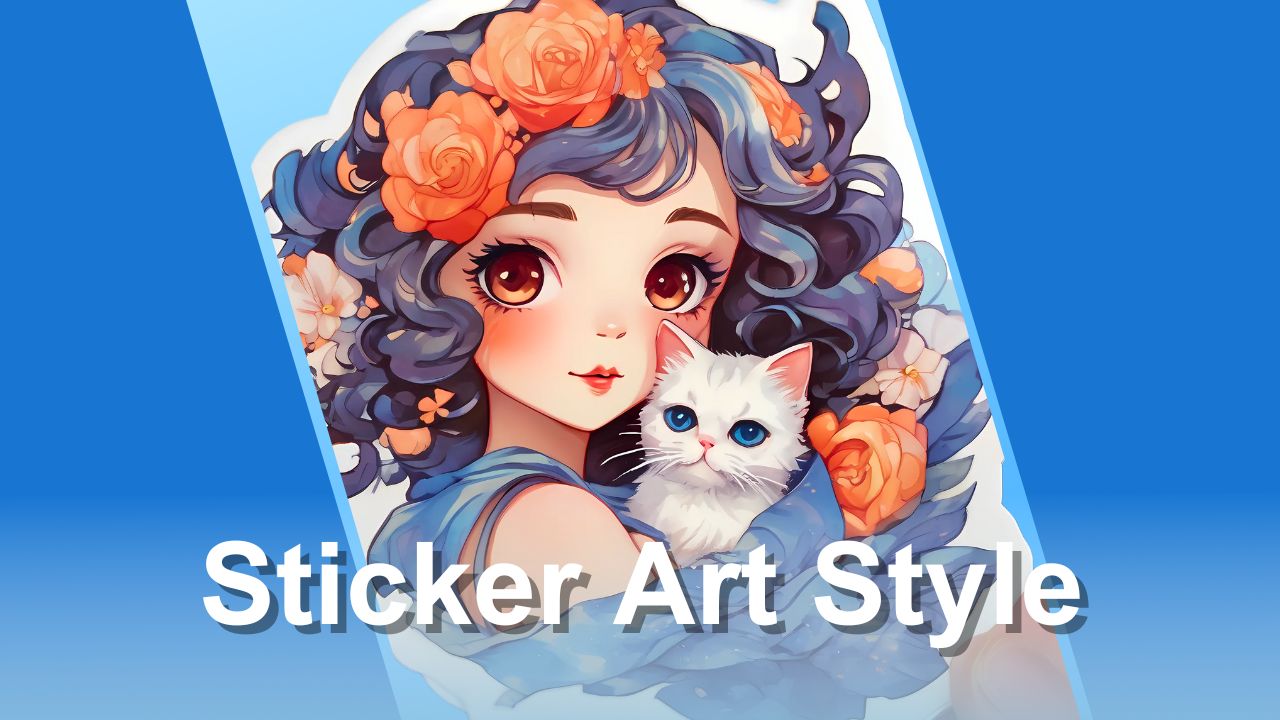
Stickers often need distinct edges for a polished look. Using terms like "white outline" in your AI prompt can help. However, the AI art generator from Img2Go - AI Creator Studio - offers the "Sticker" Art Style. It automatically generates designs with clean white borders, perfect for die-cut stickers.
Incorporating a Character into Your Sticker Design
When designing a character for a sticker, simplicity is key. Intricate details can get lost on a small surface, so focus on the core elements of your character, like their hair, eyes, or clothing. Keep the design cleanandminimalistic so your character sticker is bold, clear, and visually striking.
For tips on creating compelling character designs, check out our previous blog on character design.
Step-by-Step Guide to Creating Stickers with AI Creator Studio
Here's how to use our AI art generator to create and print custom stickers, with tips to help your designs stand out.
Step 1: Brainstorm Your Sticker Concept
Define your sticker's purpose and style before generating:
- Purpose: Personal use (e.g., decorating a journal), branding (e.g., logo stickers), or marketing (e.g., event giveaways)?
- Audience: Playful cartoons for kids, sleek logos for professionals, or trendy quotes for social media fans?
- Theme: Specific elements like animals, patterns, or seasonal designs (e.g., "Halloween ghost" or "brand logo").
- Use Case: Physical stickers (e.g., for water bottles) or digital (e.g., for WhatsApp)?
A clear concept will help you write precise AI prompts.
Step 2: Visit Img2Go and choose the AI Art Generator
To create high-quality custom stickers, start with Img2Go's AI Creator Studio, a powerful AI art generator designed for ease and versatility.
The platform offers a free tier, but premium plans unlock advanced features and more styles.
Step 3: Generate your sticker design
- Log in to your account and open the AI Creator Studio.
- Write a text prompt.
- Choose the sticker-optimized art style "Sticker."
- Click "Generate" to see multiple design variations.
Note: Don't be discouraged if the first attempt isn't perfect. AI Creator Studio lets you refine prompts for better results. Try different phrasing (for example, "add a starry background" or "Kawaii style") and use the generator's prompt editor to iterate until you're satisfied.
Step 4: Download Your AI-Generated Design
Once you're happy with your sticker design, download it as a PNG file. You can download each design separately or all variations at once as a ZIP file.
Step 5: Edit Your AI-Generated Design
Fine-tune your design using Img2Go editing tools:
- Add Text: Add a slogan, brand name, or hashtag with the Photo Editor.
- Remove Background: If your design has a background and you want a transparent version for printing, use the background removal tool.
- Resize Image: Set the design to your preferred sticker size with Resize Image.
- Upscale Image: If needed, upscale your sticker design.
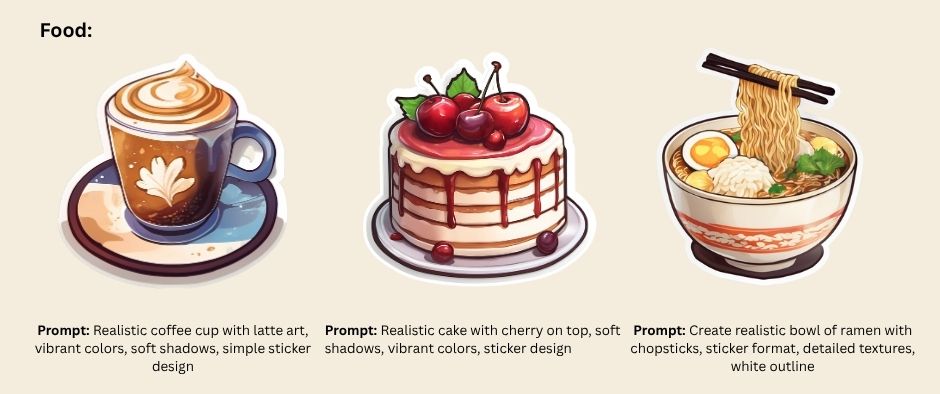
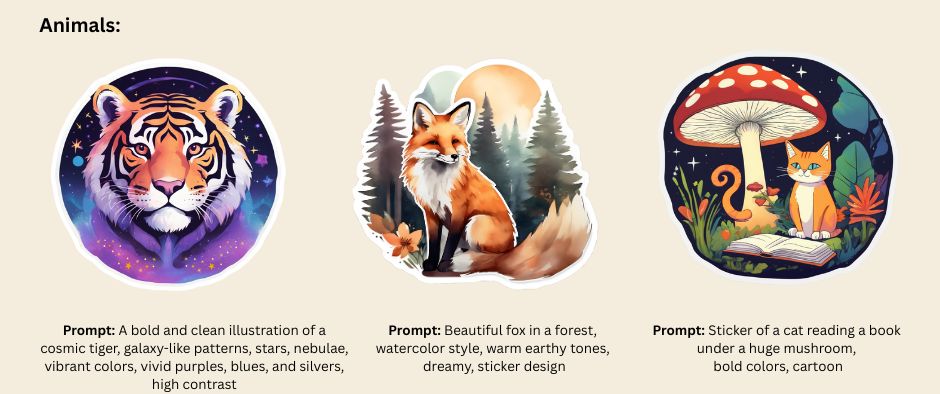
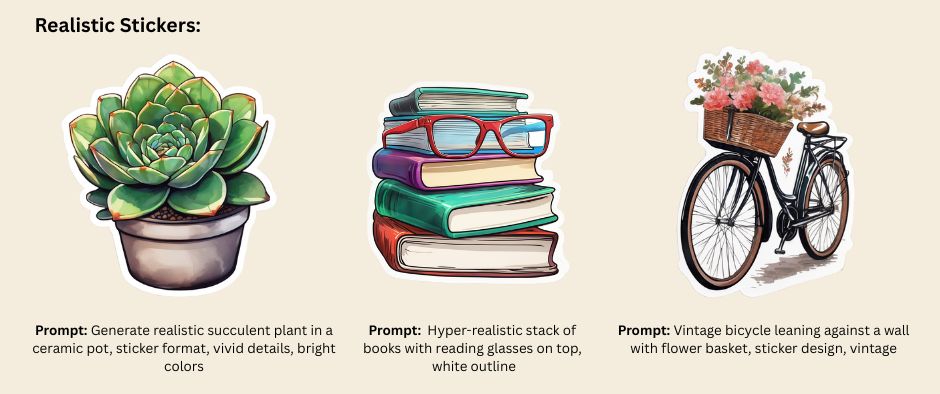
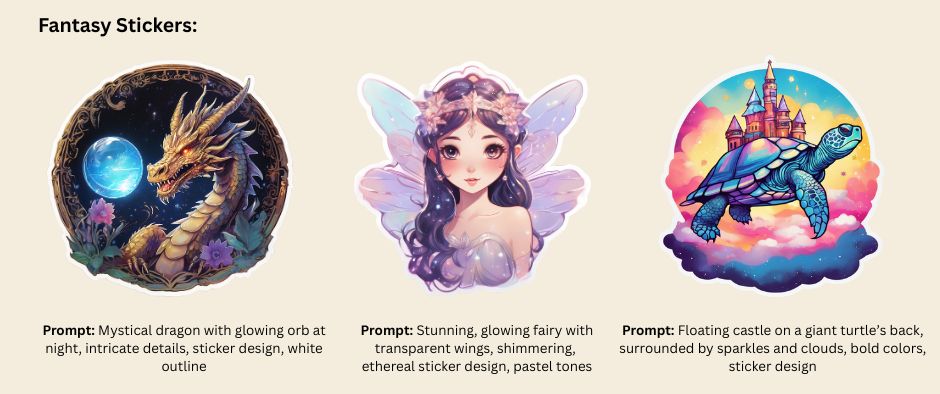
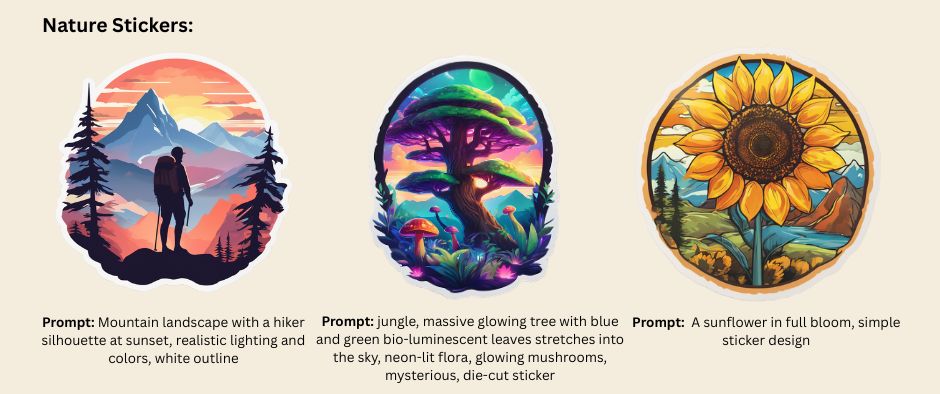
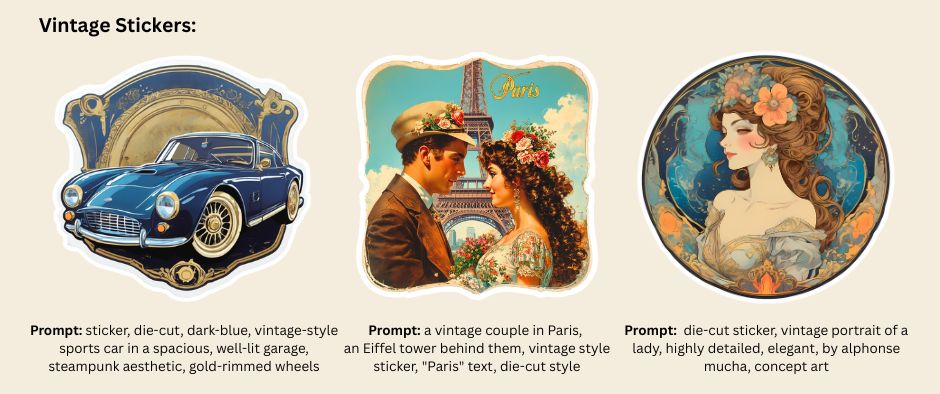
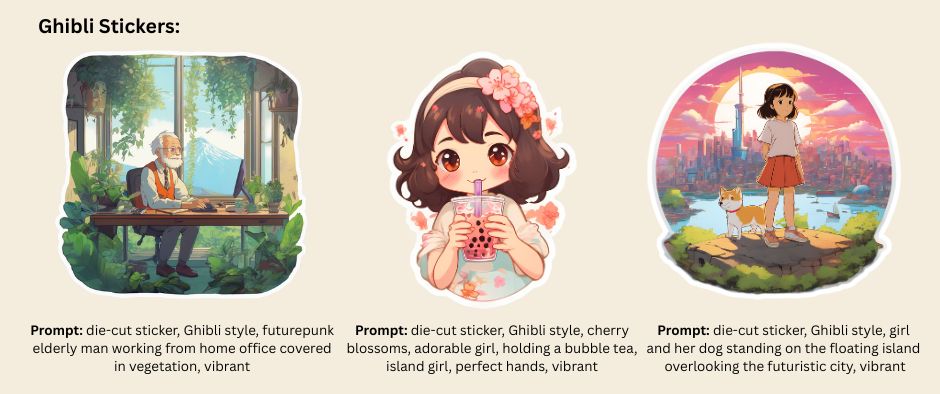
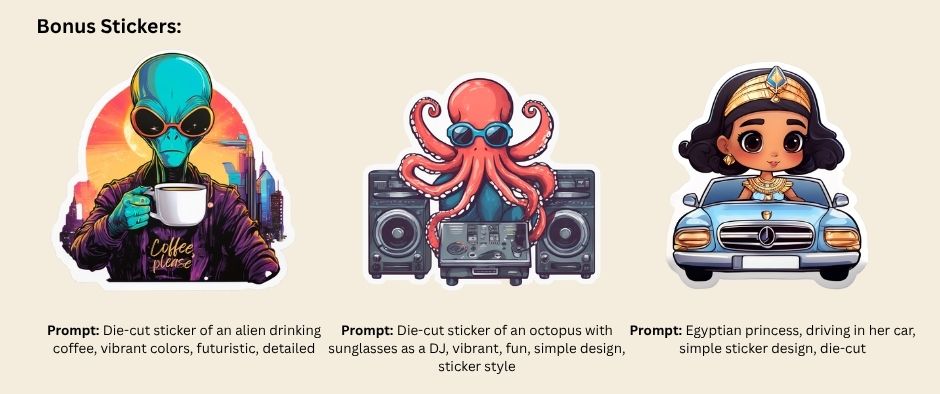
Example Sticker Prompts and Results
Here are some sample prompts for Img2Go's AI Creator Studio:
Can I use other art styles from AI Creator Studio to create stickers?
Absolutely! Just enter your prompt and choose an art style like "Artistic". Once your image is generated, you can turn it into a sticker. If needed, remove the background to isolate the subject, then add a white border afterward, and you have a sticker-ready design.
In Conclusion
AI art generators like AI Creator Studio make creating custom stickers easy, offering a fast, affordable, and creative way to bring your ideas to life. By writing clear prompts and focusing on clarity and contrast, you can create stickers that stand out for personal use, branding, or digital platforms.
Start designing with AI today and let your creativity stick.
Share your AI-generated stickers on social media. We'd love to see your creations! #AIcreatorstudio #img2go